Creating Two Nodes Proxmox VE cluster

Recently I get involved in a project which deploy a two-node Proxmox VE cluster. We got lots of opportunities and projects after what happened to VMWare Licensing earlier this year. During the process, just like other Open Source platforms, we found the Proxmox documentation and other online resources is a bit messy and confusing. Hence I decided to write an article to document the steps to setup a two-node clusters.
Let’s set the scene.
- The Proxmox version is 8.2.2
- The storage we using an FC-based SAN storage and we will use LVM with Proxmox for better performance
- Since it’s a two-node cluster, it’s required to have an external quorum device. We used a VM and installed Debian (we tried Ubuntu and got some funny issues) with corosync-qnetd. This VM could be very lightweight (like 512MB RAM, 40GB HDD). Without this quorum device, both nodes will get restarted when one of the nodes restarts.
Below is the high-level architecture for this setup.
Let’s get into the steps to do it.
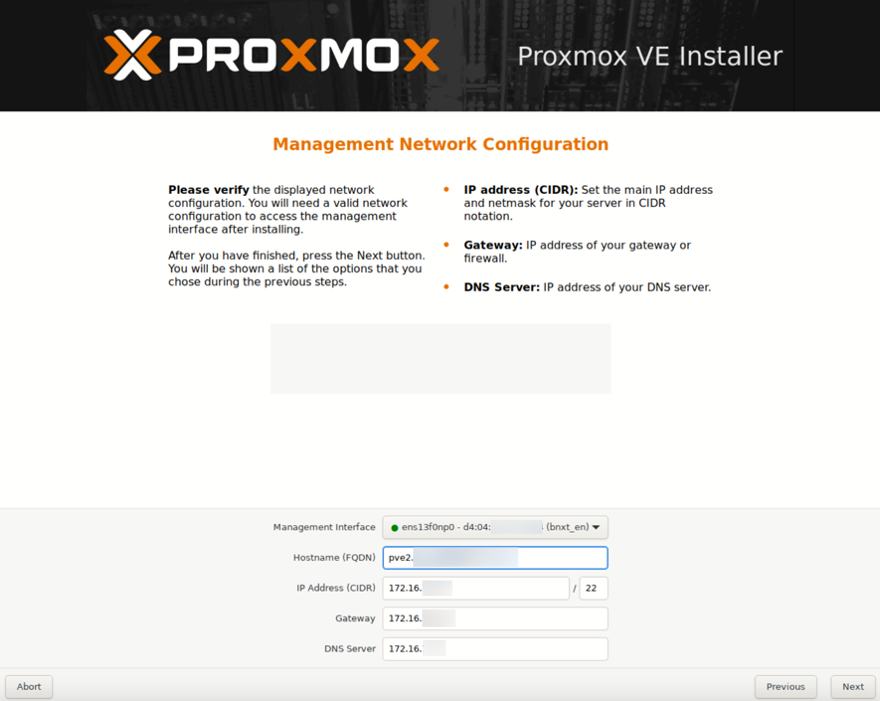
- Install Proxmox VE into the two servers. You can follow the steps in the official documentation https://pve.proxmox.com/pve-docs/chapter-pve-installation.html. Performing a standard installation on the node would be good enough. We will do all configurations afterwards.
- I usually set up the cluster before we set up storage but you can do storage first. It’s up to you not a must. So let’s set up the Proxmox cluster first
- This time, my client is using Lenovo DE storage and below are the steps we used. Remember to:
- Setup the FC connect and enable all LUNs presented to all nodes
- All the LUN is visible from all nodes (like
/dev/sdx) - Follow storage vendor's instruction in setting up the storage
- Check if all the storage is accessible from Proxmox node using either GUI or command

- Enable Multipath support in the Proxmox Environment
- Install the multipathd with
apt install multipath-tools - Configure and Start the multipathd using the following command
systemctl start multipathd
systemctl enable multipathd
- Create default multipath config using
multipad -T > /etc/multipath.conf - Get the WWID of the drive using
/lib/udev/scsi_id -g -u -d /dev/sdx. Note that /dev/sdx should correspond to the device mount point of the LUN
- Edit the multipath.conf to add the WWID to the blacklist_exceptions list
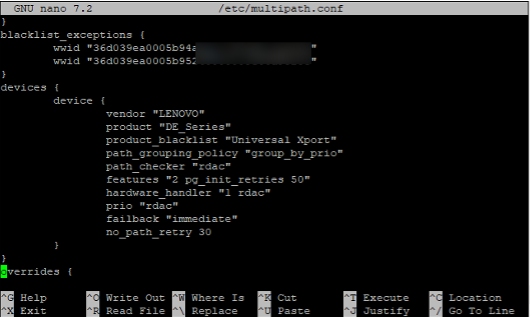
- Use
multipath -a <wwid>to add the multipath support of the LUN using the WWID obtained earlier - Confirm result using
multipath -ll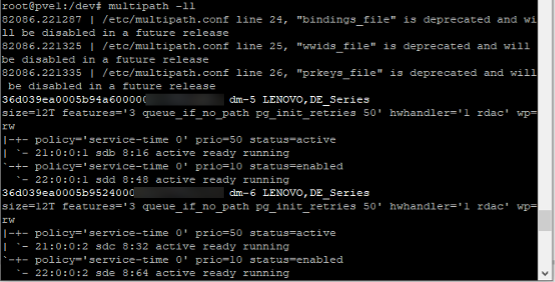
- Confirm multipath is enabled by checking
/dev/mappermount points
- Create Proxmox Cluster
- At node1, click Create Cluster in Datacenter > Cluster node
- After that, click Join Cluter in other node and then use the Join Information from node1 to connect the cluster

- Add multipath-ed LUN /dev/mapper/xxx to the Proxmox cluster.
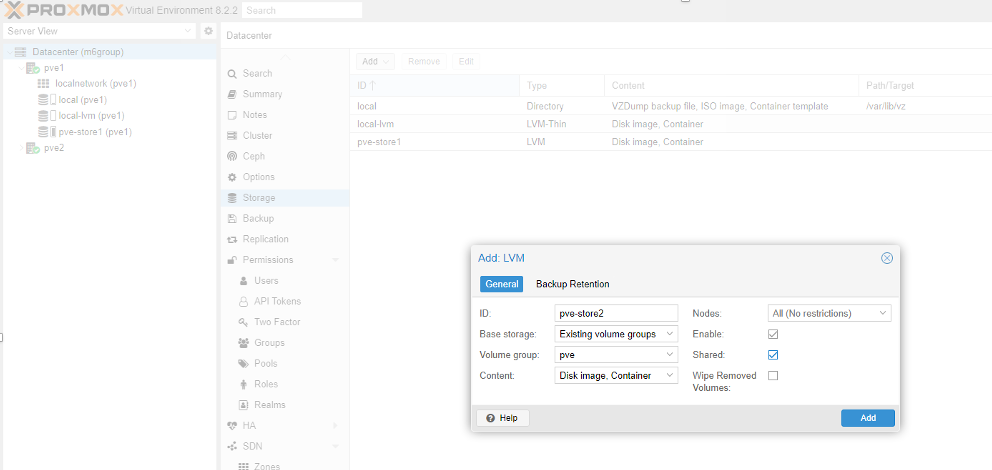
- Run the following commands at one of the nodes to create the LVM.
pvcreate /dev/mapper/xxx1
pvcreate /dev/mapper/xxx2
vgcreate pve-store1 /dev/mapper/xxx1
vgcreate pve-store2 /dev/mapper/xxx2
- Add the created LVM to the PVE cluster. Remember that we need to add at the cluster level.
 6. Setup network like the followings by modifying /etc/network/interfaces and make sure all nodes with the same setting (at least the bridge and interface name).
auto lo
iface lo inet loopback

iface ens13f0np0 inet manual

iface ens13f1np1 inet manual

iface ens5f0np0 inet manual

iface ens5f0np0 inet manual

auto bond0
ifance bond0 inet manual
    bond-slaves ens13f0np0 ens5f0np0
    bond-mode active-backup

auto bond1
ifance bond1 inet manual
    bond-slaves ens13f1np1 ens5f1np1
    bond-mode active-backup

auto vmbr0
ifance vmbr0 inet manual
    address 192.168.1.100
    gateway 192.168.1.254
    bridge-ports bond0
    bridge-spt off
    bridge-fd 0

auto vmbr1
ifance vmbr1 inet manual
    bridge-ports bond0
    bridge-spt off
    bridge-fd 0
- After all setups ok, perform the following to add the external quorum support.
- Install a Debian VM and install the two packages
apt install corosync-qdeviceandapt install corosync-qnetd - On all nodes, perform the
apt install corosync-qdevice - Make sure all the nodes are able to ssh to each other using the root account. You can test that by
ssh [email protected]. Make sure you save the SSH key during the testing. - On one of the PVE nodes, setup the quourm by using command
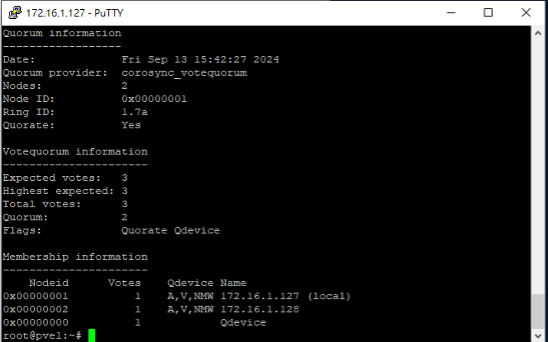
pvecm qdevice x.x.x.x - Wait for the process to complete and you can verify the result using pvecm status. You should see at the end there is a QDevice listed
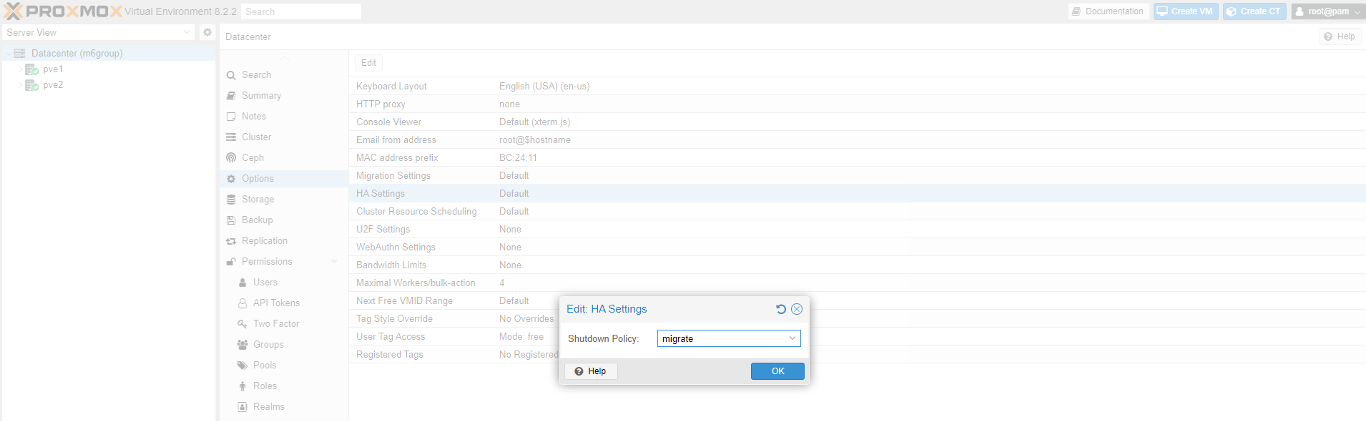
The final step is to update the cluster failover policy from default to migration so Proxmox VE cluster will try to move VMs to other nodes when we restart.